Afficher, modifier ou supprimer une réponse à une demande
|
Activer la collaboration via des formulaires externes Contactez votre responsable de la réussite client ou votre chargé de compte pour activer cette fonctionnalité pour votre application. |
Lorsqu'un destinataire externe remplit une demande, Case IQ enregistre sa réponse. Si vous êtes autorisé à consulter les réponses aux demandes, vous pouvez y accéder depuis la page du dossier, sous l'onglet Activité et le sous-onglet Formulaires. Pour plus d'informations sur l'envoi de demandes à des destinataires externes, consultez la section Envoyer une demande de remplissage de formulaire .

Fonctionnalités de la page de réponse
Consultez la capture d'écran annotée et les explications qui l'accompagnent pour chaque fonctionnalité de la page de réponse ci-dessous. Nous utilisons un exemple de formulaire « Déclaration de témoin » dans cet article, mais les champs de votre application seront différents.

- Bannière de requête liée : si cette réponse a été demandée à un destinataire externe, un lien vers la requête apparaîtra en haut de la page.
- Numéro de dossier : le numéro du dossier associé au formulaire.
- Numéro de réponse : un numéro est généré pour identifier la réponse au dossier. Par exemple, si vous avez ajouté une autre déclaration de témoin au dossier, le numéro serait 2025-001/ 3 .
- Bouton Modifier : cliquez sur le bouton Modifier pour modifier les détails de la réponse. Pour plus d’informations, consultez la section « Modifier une réponse » de cet article.
- Bouton Lien : cliquez sur le bouton Lien pour afficher tous les enregistrements liés à la réponse. Pour en savoir plus, consultez la section « Lier une réponse » de cet article.
- Bouton Options : permet d’accéder à des actions supplémentaires, notamment les options « Afficher la source de l’enregistrement » et « Supprimer » (voir les détails dans les sections « Afficher la source de l’enregistrement » et « Supprimer une réponse » de cet article).
- Détails de la réponse : informations saisies lors de la saisie de la réponse, que ce soit à titre de demande ou pour le compte d’un tiers, dans l’application. Consultez la section « Envoyer une demande de remplissage de formulaire » pour plus d’informations sur la création de réponses.
- Section « Réservé à un usage interne » : informations fournies par les utilisateurs internes après la création de la réponse. Les champs de cette section ne sont pas accessibles aux destinataires externes. Une fois la demande traitée, les utilisateurs internes peuvent compléter ces champs en modifiant la réponse.
Modifier une réponse
Si vous êtes autorisé à modifier les réponses aux demandes , vous pouvez modifier la section « Usage interne uniquement » ainsi que les informations fournies par le destinataire. Pour modifier une réponse :
- Cliquez sur le bouton Modifier sur la page de la réponse.
- La page de réponse est maintenant en mode édition. Utilisez les zones de texte, les listes déroulantes, les boutons radio et les autres options de saisie de données pour mettre à jour les informations dans les champs du formulaire.
- Une fois vos modifications terminées, cliquez sur le bouton Enregistrer .
Lier une réponse
Vous pouvez associer une réponse à un autre enregistrement, tel qu'une partie, une note ou un fichier, relatif à la même affaire, afin d'établir un lien. Par exemple, vous pouvez associer une réponse à la partie qui l'a créée en complétant une demande. Vous pouvez associer une réponse depuis sa page en suivant les étapes suivantes :
- Cliquez sur le lien (
 ) bouton sur la page de réponse.
 - Dans la fenêtre contextuelle « Afficher tous les enregistrements liés », cliquez sur le bouton Lier les enregistrements .
- Sélectionnez un « Type de lien d'enregistrement » pour le lien. Le type de lien indique la nature de la relation entre les enregistrements.
- Les administrateurs peuvent configurer les types de liens d'enregistrement disponibles dans les Paramètres ; consultez la section Ajouter, modifier et supprimer des types de liens d'enregistrement pour plus de détails.
- Dans le tableau, vous verrez tous les enregistrements du dossier auxquels vous avez accès. Sélectionnez un ou plusieurs enregistrements à lier à la réponse. Vous pouvez lier jusqu'à 50 enregistrements simultanément.
- Une fois que vous avez terminé de choisir le type de lien d'enregistrement et les enregistrements, cliquez sur le bouton Lier les enregistrements .
- Le système créera les liens en arrière-plan. Une fois créés, les liens que vous avez ajoutés s'afficheront sur la page de la réponse, la page de l'autre enregistrement et la page du dossier, sous l'onglet Liens.
Consultez la section « Lier les enregistrements d'une affaire » pour plus de détails sur la modification et la suppression des liens entre les enregistrements.
Supprimer une réponse
Si vous devez supprimer définitivement une réponse, vous pouvez la supprimer directement depuis la page de la réponse . Cliquez sur Options (  ) bouton, puis sélectionnez « Supprimer ».
Afficher la source de l'enregistrement
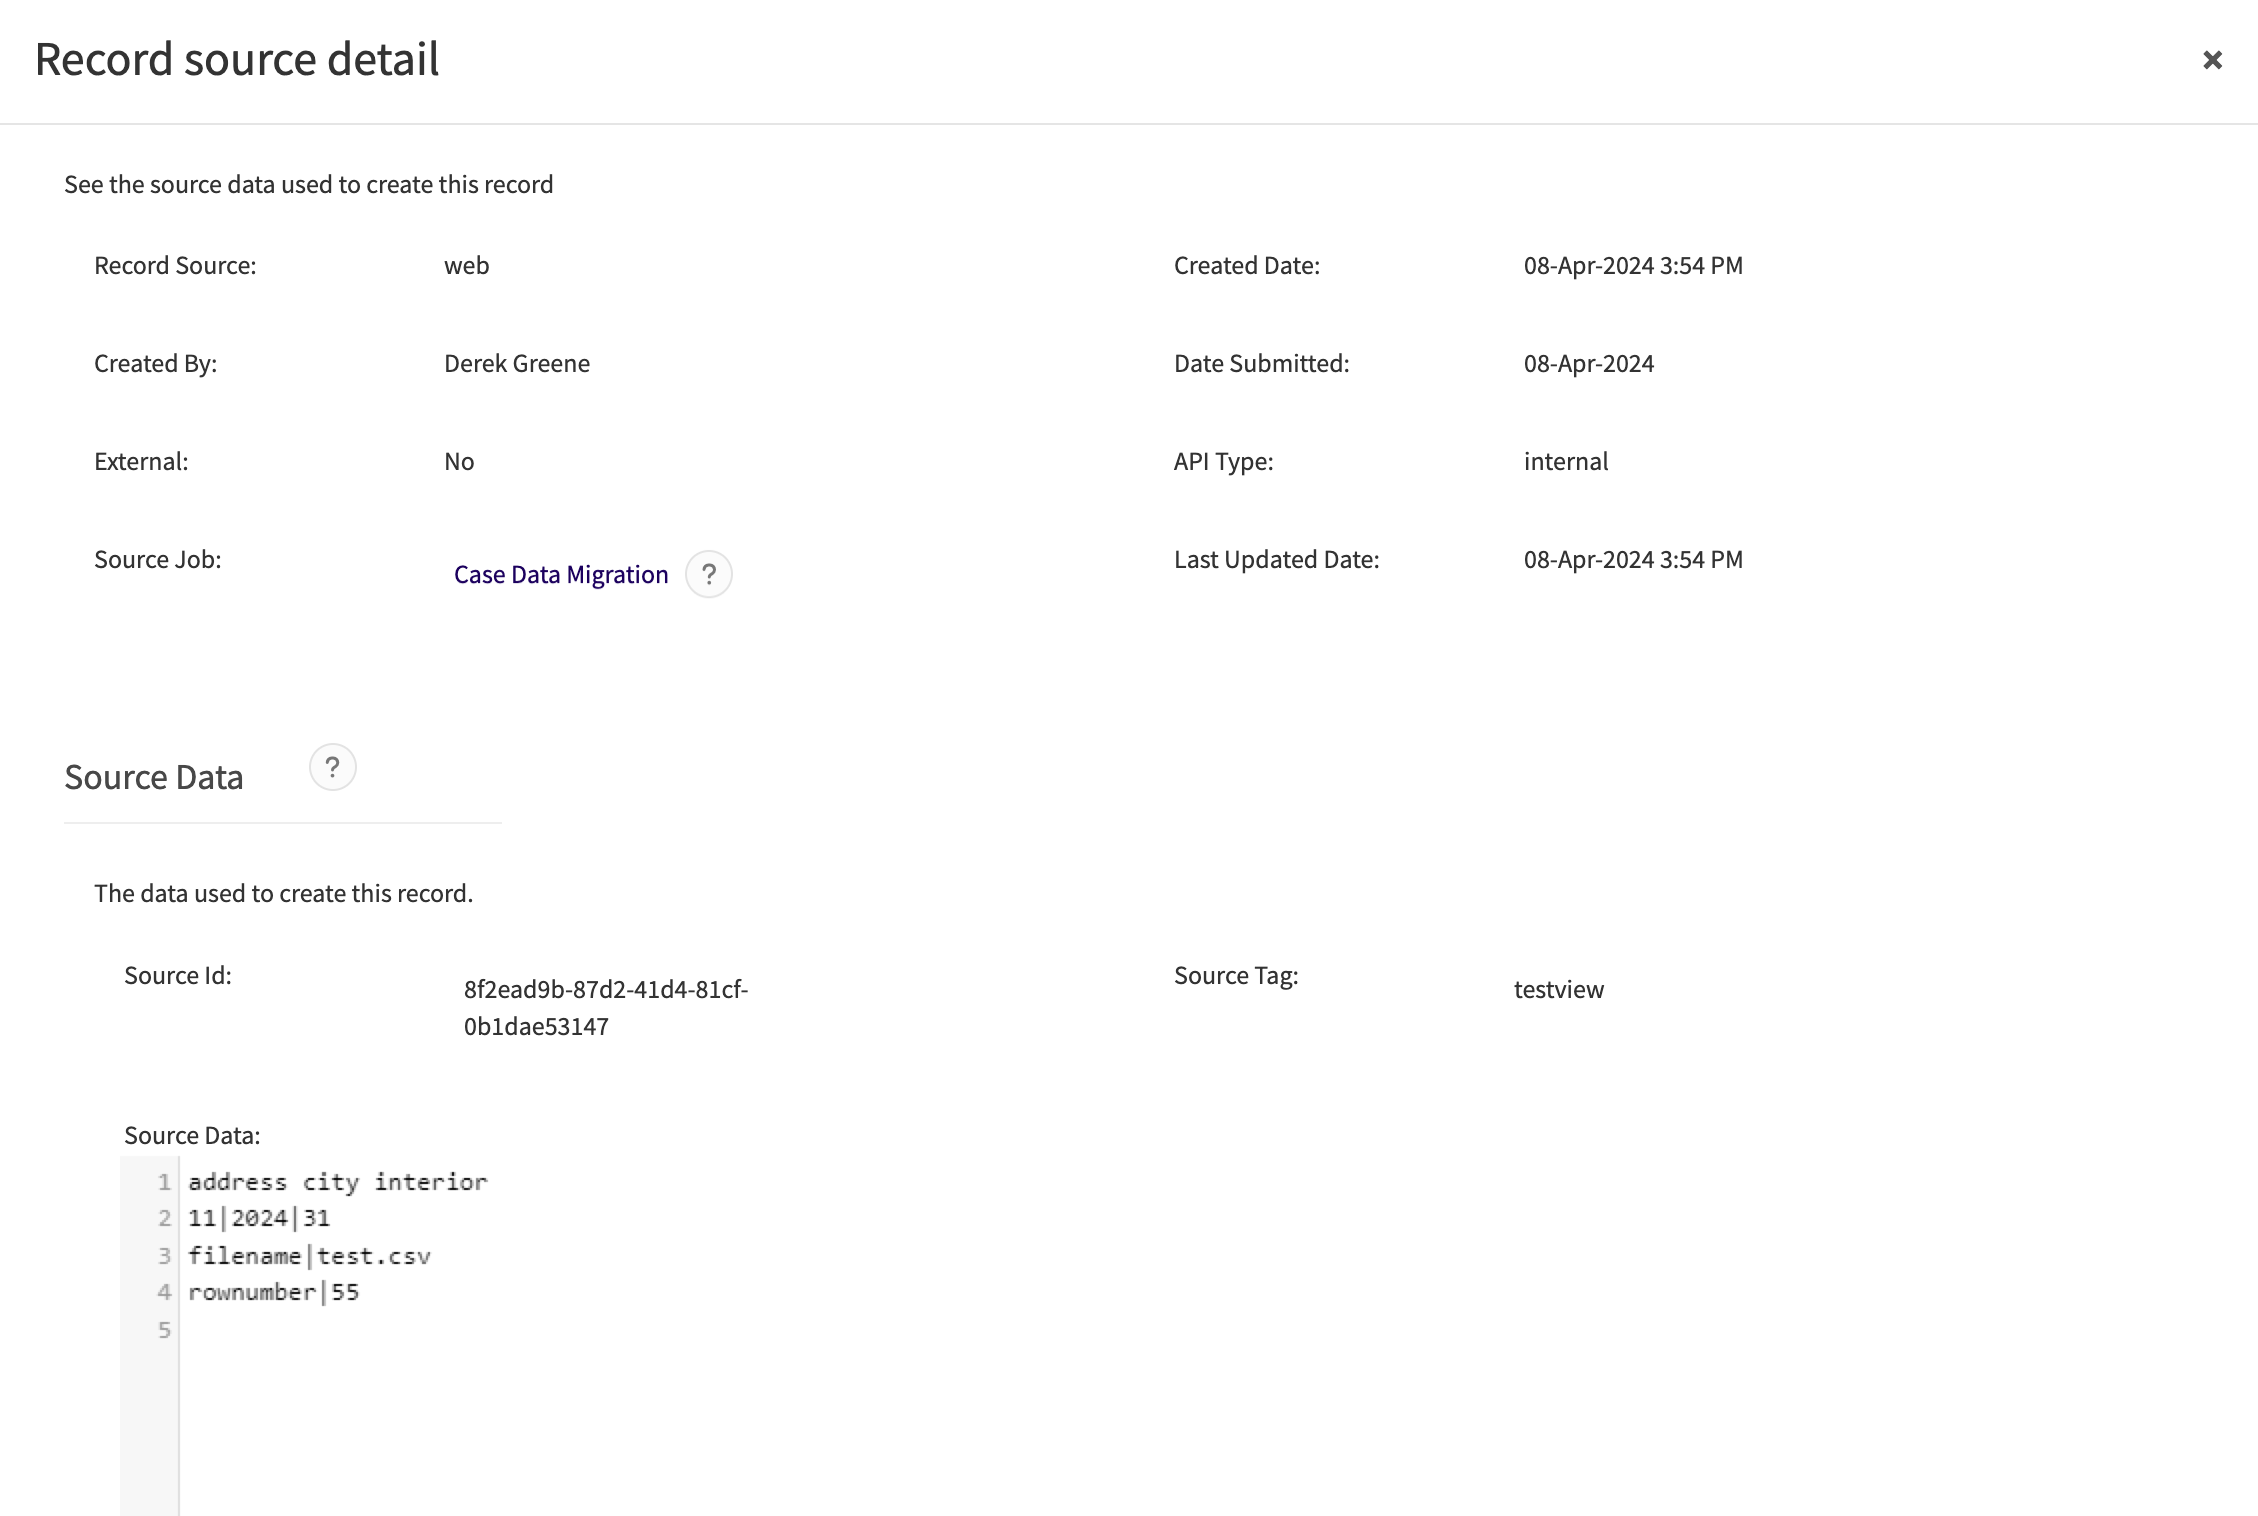
L' option « Afficher la source de l' enregistrement » permet de surveiller ou de dépanner les migrations ou intégrations de données de votre application . Elle ouvre la fenêtre contextuelle « Détails de la source de l' enregistrement » , vous permettant ainsi de vérifier les valeurs des champs système lors de la création de la réponse . Si celle - ci a été générée par une intégration ou une importation de données , les champs « Tâche source » et « Données source » s'affichent également dans cette fenêtre . La section « Données source » indique la ligne du fichier d' importation de données utilisée par le système pour créer la réponse . Vous pouvez consulter le journal des tâches enregistré par le système lors du traitement de ce fichier en cliquant sur le lien du champ « Tâche source » .
