Manually Upload a File
You can add the following types of files to cases:
| File Upload | Add a file from your device to a case. |
| Generated Document | Create a document for the case using a template configured by your System Administrator. See Generate Documents from a Template for steps. |
| Packet | Generate multiple documents from templates, then collect them in a single .pdf file. See Generate Documents from a Template for steps. |
| Custom Packet | Choose templates to generate documents, then collect the documents in a single .pdf file. See Generate Documents from a Template for steps. |
| URL | Create a link to another website. See Add a URL to a Case for steps |
This article covers how to upload a file to a case to attach supporting files for your case investigation, like text documents, images, spreadsheets, and videos, from your device to a case. As of Case IQ v9.17, you can drag and drop files on a case, see Drag and Drop Files to a Case for details.
Upload a File to a Case
You can attach a file from your device to a case using the following steps. You can upload one file per file record. See the types of files you can upload in Supported File Types.
- Navigate to New File form via one of the following buttons:
- The Add File button on the Files Grid page.
- The “+ Add
 ” button on a case’s page.
 - The Add File button on a case’s page, under the Files tab.

- On the New File form, select a case to which to add the file if the "Case" field is not already filled in.
- In the "Kind" field, select "File Upload".
- You can enter a description of the file in the "Summary" field. Your application may have additional fields on the New File form, depending on the configuration of your application.
- In the "Attachments" box, upload the file to add to your case by either:
- Clicking the Upload a File from your Computer button and choosing a file from the file browser.
- Dragging and dropping a file from your desktop into the New File form.
- Click the Save button to upload the file. You can also use the “Save and Copy” option in the Options (
 ) button menu to quickly add another file for the same case. The original file record will be saved and another New File form will be loaded. All values that you entered in the previous form will be copied over to the current New File form.
- To link the file to another record, see Link a File to Another Record.
- To grant the case's reporter access to the file, see Allow a Portal Reporter to View the File.
Grant AI Access to a File
|
Clairia and Copilot Fields Premium Feature Reach out to your Customer Success Manager or Account Executive to learn more about this feature. |
Case IQ's AI, including Clairia and copilot fields, can reference files uploaded to a case to generate meaningful and relevant responses. The AI will only use files to which you have granted it access. See Start, Rename, or Delete a Chat with Clairia and Generate Content for a Case Using AI for details on using Clairia and copilot fields.
To allow Clairia and copilot fields to use a file, check the "Enable for AI" checkbox on the New File form. When you click the Save button, the system will begin processing the file so the AI can use it. You will see a confirmation banner on the file's page when processing is complete.
Link a File to Another Record
When adding a file, you can link it with another record, such as a party, note, or to-do, for the same case to show a connection. For example, you could link a file to a party to show that the party provided the file for the investigation. You can link a file on the New File form using the following steps:
- Click the Link (
 ) button on the New File form.
 - In the "View all linked records" pop-up, click the Link Records button.
- Select a "Record link type" for the link. The link type indicates how these records are related to each other.
- Administrators can configure the available record link types in Settings, see Add, Edit, and Delete Record Link Types for details.
- Select one or more records to which you want to link to the file. You can link up to 50 records with the file at once.
- When you have finished choosing the record link type and records, click the Link Records button.
- The links will be created after you save the New File form. When the links are available, they will be displayed on the file's page, the other record's page, and the case's page under the Links tab. You can now close the "View all linked records" pop-up and continue filling in the New File form.
You can add and edit more links after creating the file. Refer to Link a Case's Records for details on editing and deleting record links.
Allow a Portal Reporter to View the File
If the case for which you are adding the file is external and you have the appropriate permissions, you can allow the individual who reported the case to access the file. This means that the reporter can log in to your application's portal and view the file for the case they added. Check the "Allow Reporter Access" checkbox before saving the New File form to let the reporter view the file.

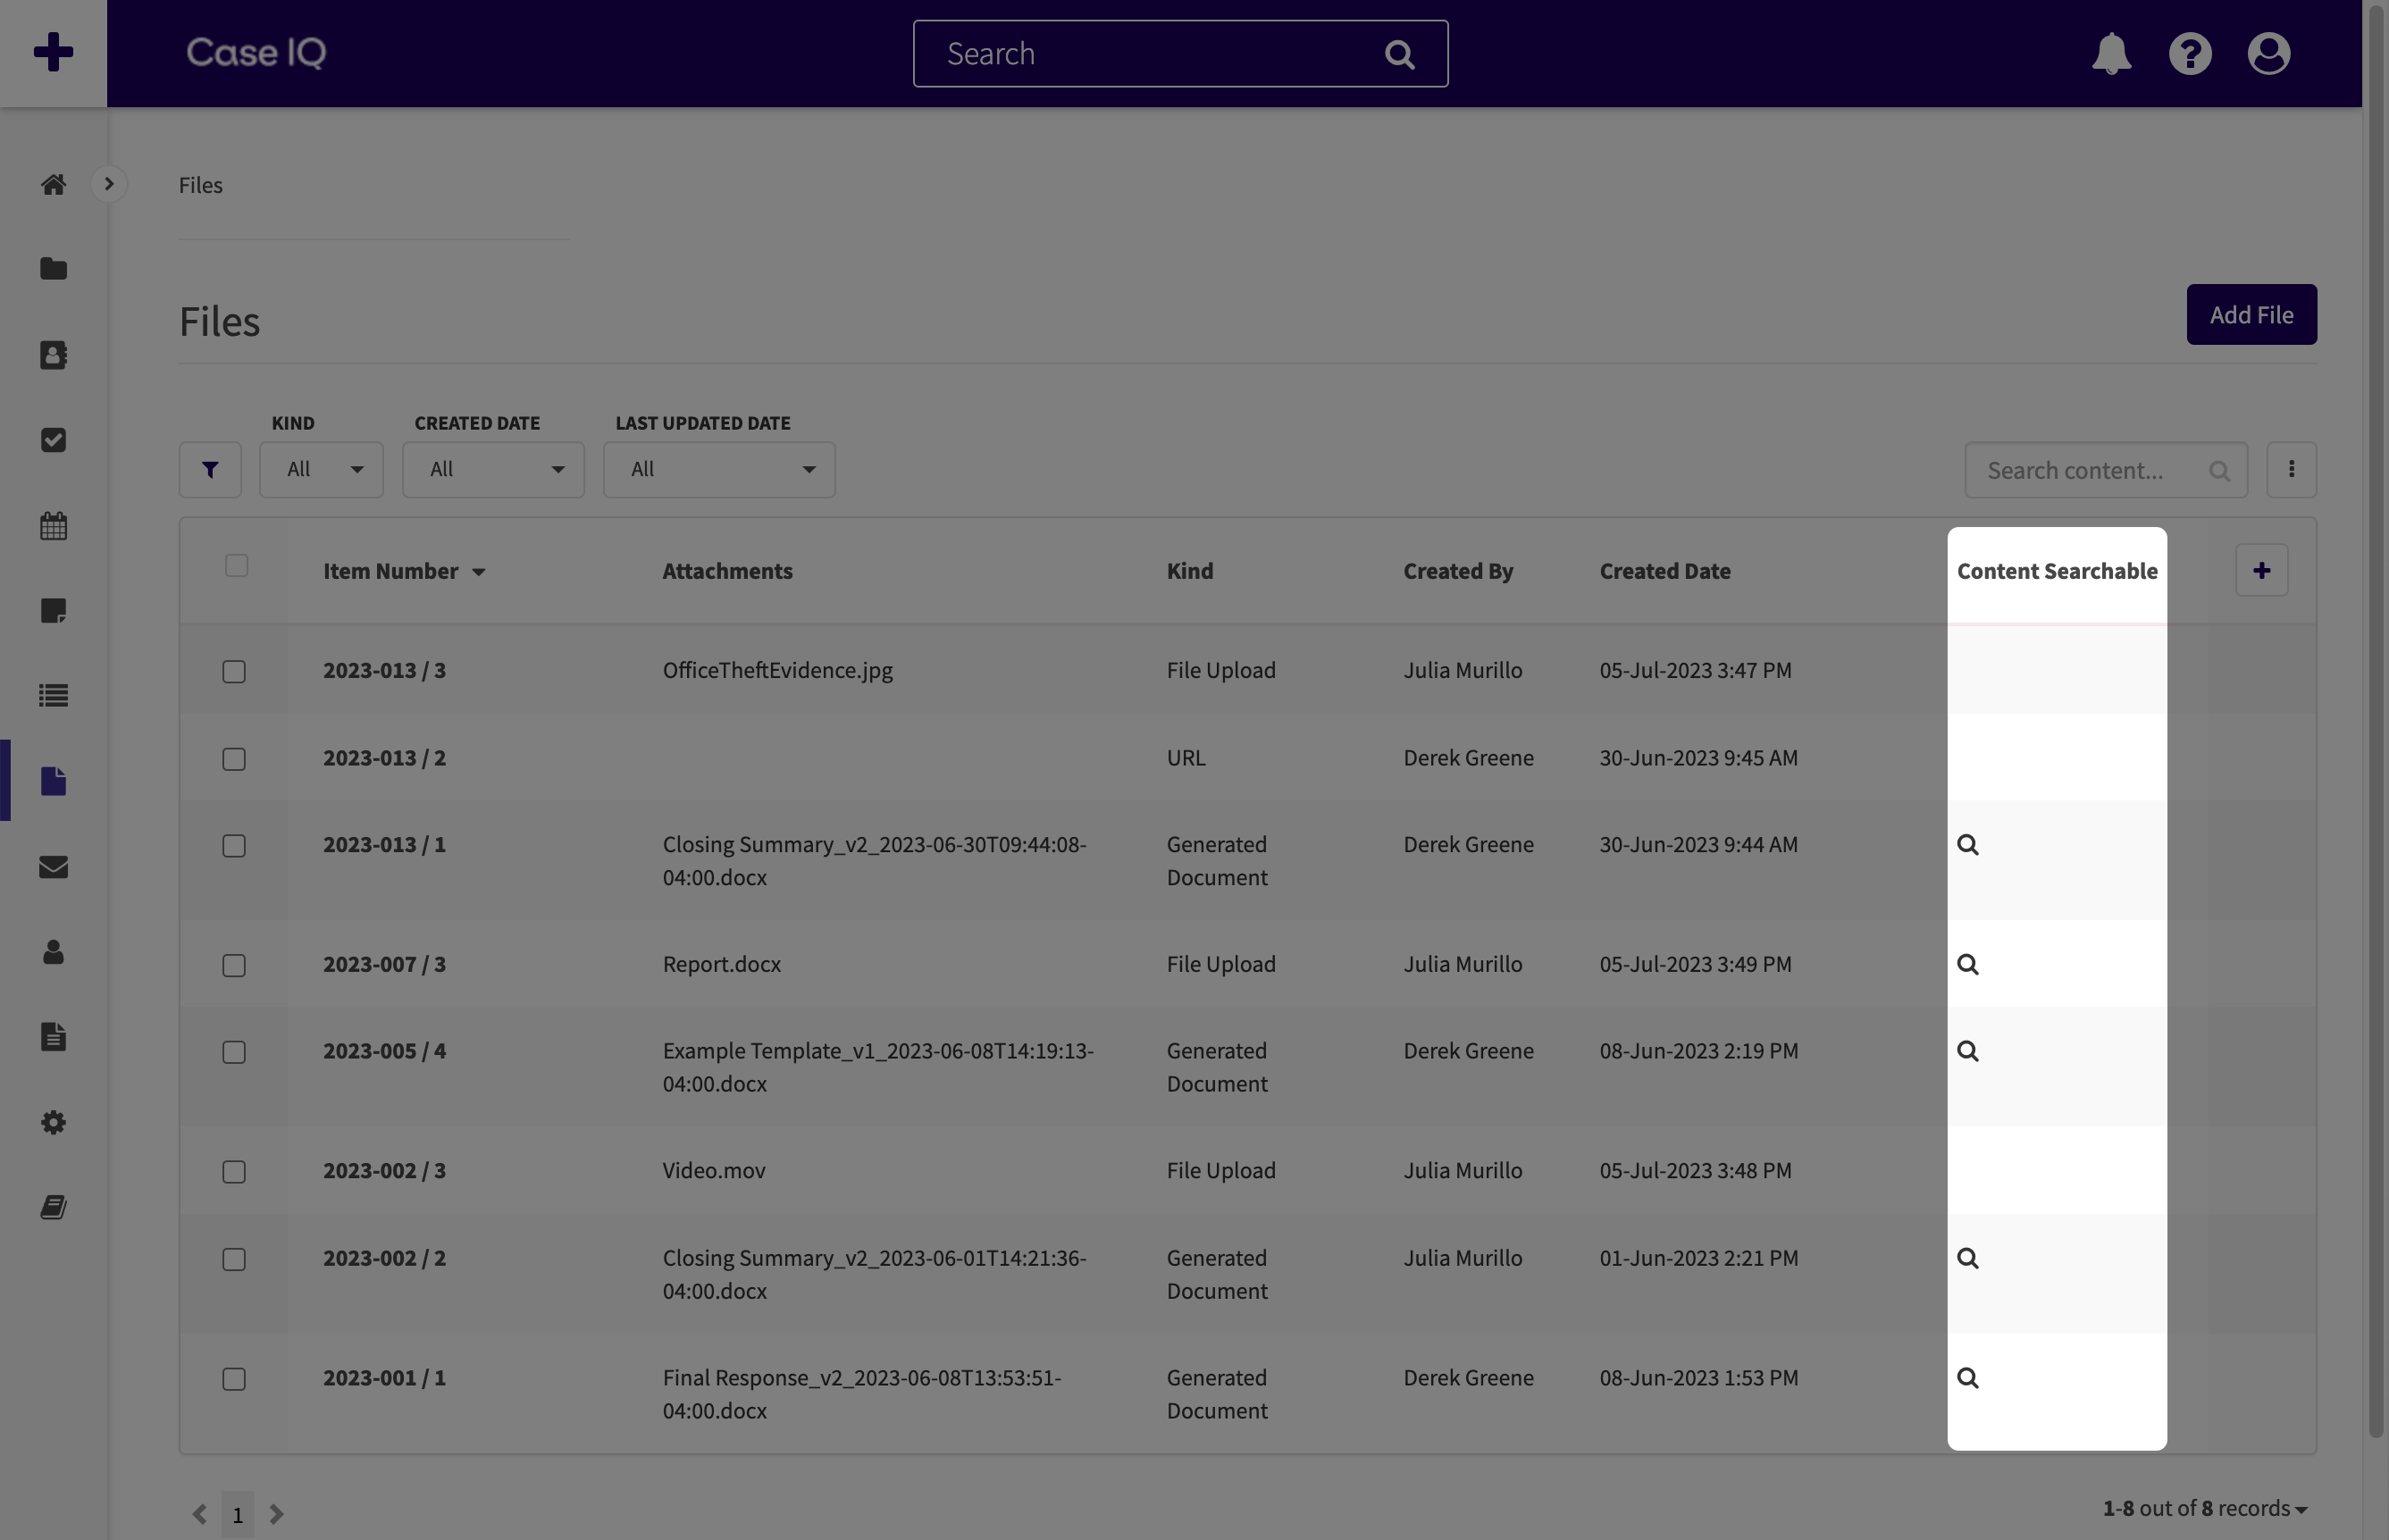
Content Searchable Files
Case IQ can search for text in some files when you run a quick or advanced search (see Search in Case IQ for details on quick and advanced searches). Any text files (.docx, .pdf, or .txt) under 15 MB can be pulled in search results.
You can check if Case IQ can search through a file in the "Content Searchable" column on the Files grid. You will see a magnifying glass icon ( ) in the file's row if it is content searchable. If you do not see the "Content Searchable" column in your application, you can add it to your view from the grid's Column Menu (
 ) (see Configure a Grid: Add or Remove a Column for more).
FAQ
Can I add files to a closed case?
Yes, you can add files to closed cases (i.e. cases where all their workflows are closed).
Can I upload multiple files at once when creating a case?
You can only drag and drop multiple files after submitting a case, meaning you cannot upload files in bulk on the New Case form.
What file formats can I upload?
See the types of files you can upload in Supported File Types.
How many files can I upload to a case?
You can add a maximum of 1000 files to a case in your application and upload 20 files at a time.
From the external portal, reporters can add up to 50 files when submitting or reviewing their case.
What is the maximum file size I can upload?
The maximum file size you can upload to a file record is 50 MB.
How many files can I download at once?
You can download up to 20 files at once from the Files Grid page.
Case IQ could not upload a file. How can I resolve?
If Case IQ could not attach a file you uploaded:
- Make sure the file is a supported file type. See a list of all file types you can upload to Case IQ in Supported File Types.
- Remove any access permissions in your file. Case IQ will not be able to upload restricted or protected files.
- Check how many files have been attached to the case. You can upload a maximum of 1000 files to a case.